Tuesday, 1 May 2012

Fun with Art Parts

Well, what can I say?

I'm in love again!

I went to my lovely local craft shop - Let's Create- in Coningsby on Saturday. Jo had arranged for Hels Sheridan to come along and demonstrate her wonderful work with Wendy Vecchi's "Art Parts" and Tim Holzt's Distress Ink/Stain etc.

I was hooked from the word go, so I used up all of my limited funds to buy some "essentials". The stamp set I really wanted had sold out, but Hels kindly gave me some of her pre-stamped flowers so that I could at least have a go.
I went home, made a quick bolognaise (thanks for the suggestion Maria), and started to play with my goodies.
Not having many of the nik-naks needed for this kind of craft, I had to improvise. My lovely hubby has a saying for this...............
"It's not bodging, it's utilising all available resources"
............needless to say I had LOTS of fun, and yes I am in love ALL OVER AGAIN :o)

This little table - my very first make- stands 7" tall to the top of the butterfly wing.


I then made this lttle frame. it is a mere 4" high.


Those roses are such fun to make, and rest asured, as soon as Jo has them back in stock, I WILL be buying the stamp.


Shellie.

Thursday, 19 April 2012

A 90th Birthday card, and a tutorial.


Firstly, an apology.
I'm so sorry that I haven't been around for a while, life just got in the way a bit.

Now for the latest make...............
This is the card I made for my Nanna's 90th birthday. It is A4 size, so it took quite a bit of making!


I showed it to some lovely friends of mine who suggested I do a tutorial for the basket ( I hand drew and coloured it), so here goes.............


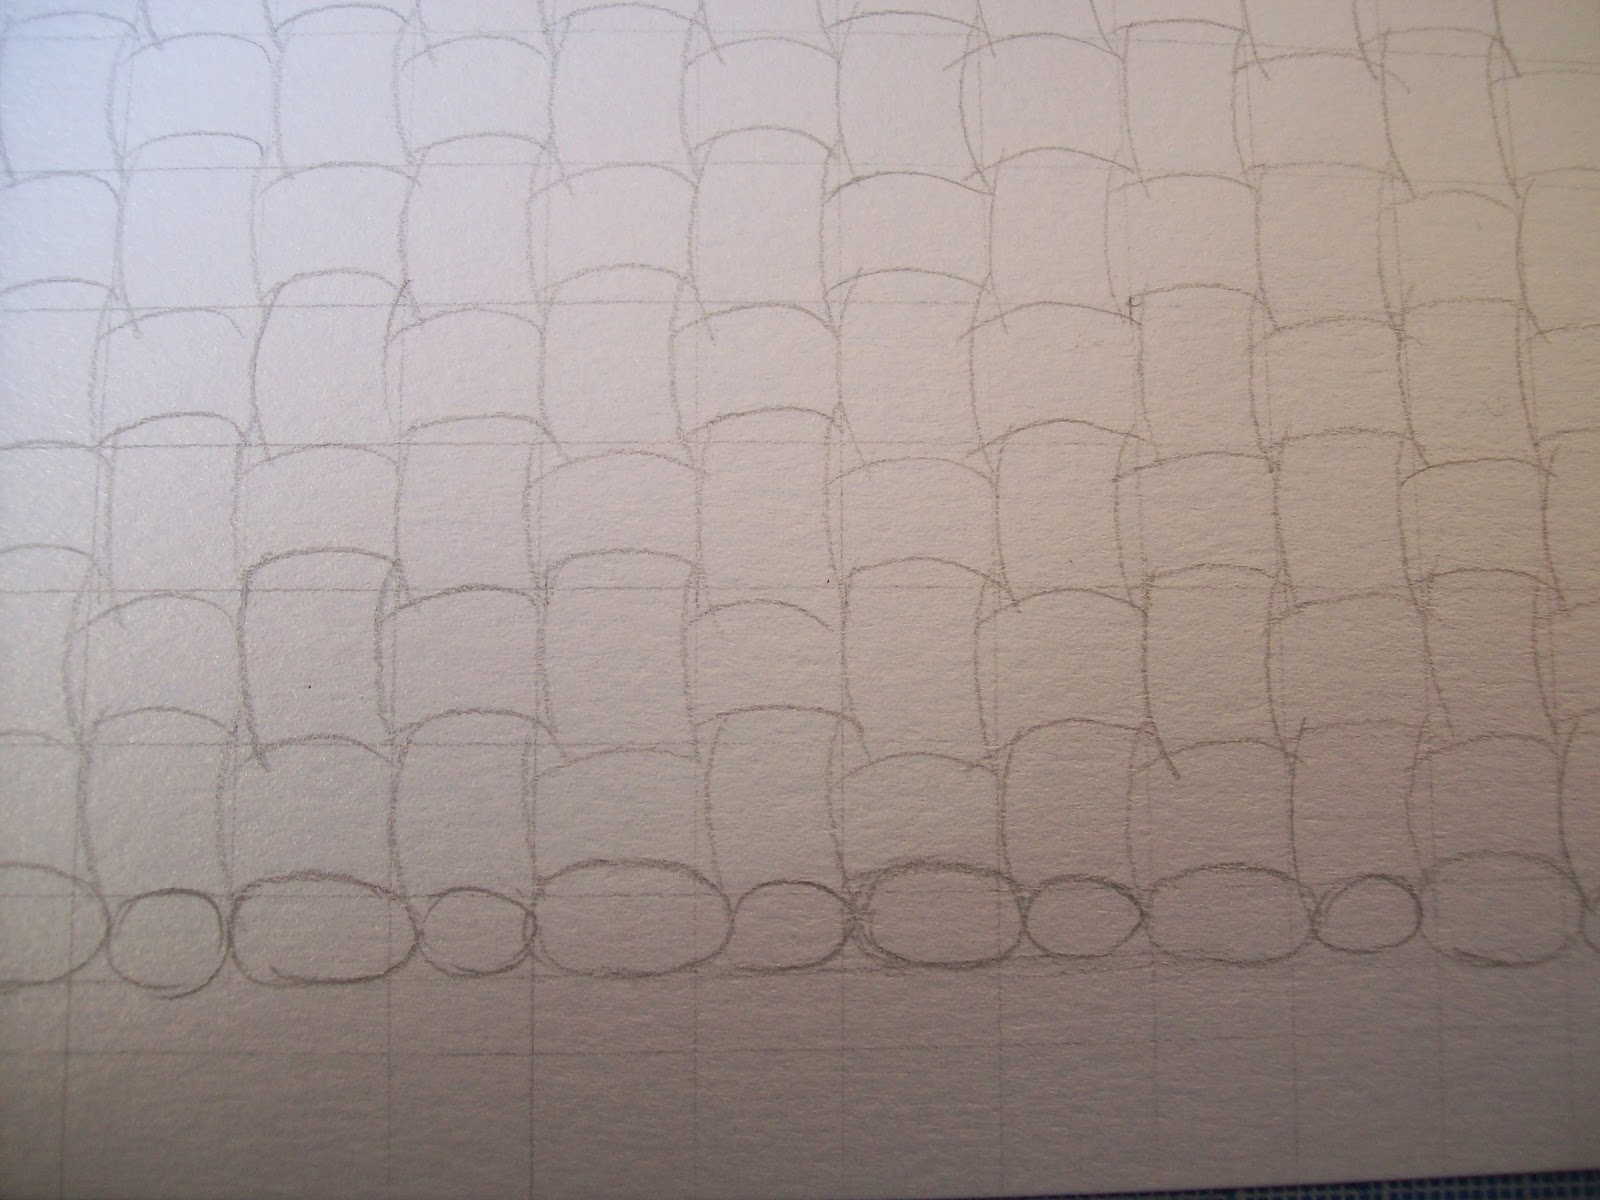
1). Using pearlised cardstock, take an A5 piece and mark a 1cm grid lightly in pencil.
      On every other square draw semicircles top and bottom of the square.


2). In the squares between, do the same again.


3). Now add the vertical semicircles.


4). Add circles to the bottom to finish the weave.


5).  Finish the top of the basket with more circles and a fancy edge.


6). Now ink the basket in using micron 04 pen or similar. (it must be a pen which is compatible with your choice of blending pen). Erase the pencil lines.


7). Colour the areas between the weave to add depth.


8). Add shading and crease lines for definition.


9). Colour with your choice of blending pen. I used Promarkers.
      Add a little extra shading for depth.


10). Cut and fold the basket, adding contrasting ribbon and a bow.


11). Attach to your card front and fill with flowers, leaves and swirls. I used Little Claires "flowerhead" stamp and some hand-drawn leaves.


12). The last step is to protect your basket with a sheet of Acetate, and embellish with more ribbon.


I hope you found this tutorial interesting and informative. The technique can be used for many different shapes and sizes of basket.

Until next time, take care and happy crafting.

Shellie xx


Tuesday, 28 February 2012

my two passions

I have been trying out a new technique. I love to make cards AND I love to sew, so I thought I'd try mixing the two. Here are the results. I thoroughly enjoyed making them, and I will definately carry on in the vein for a good while longer yet!
I have so many ideas in my head, and not enough hours to craft.


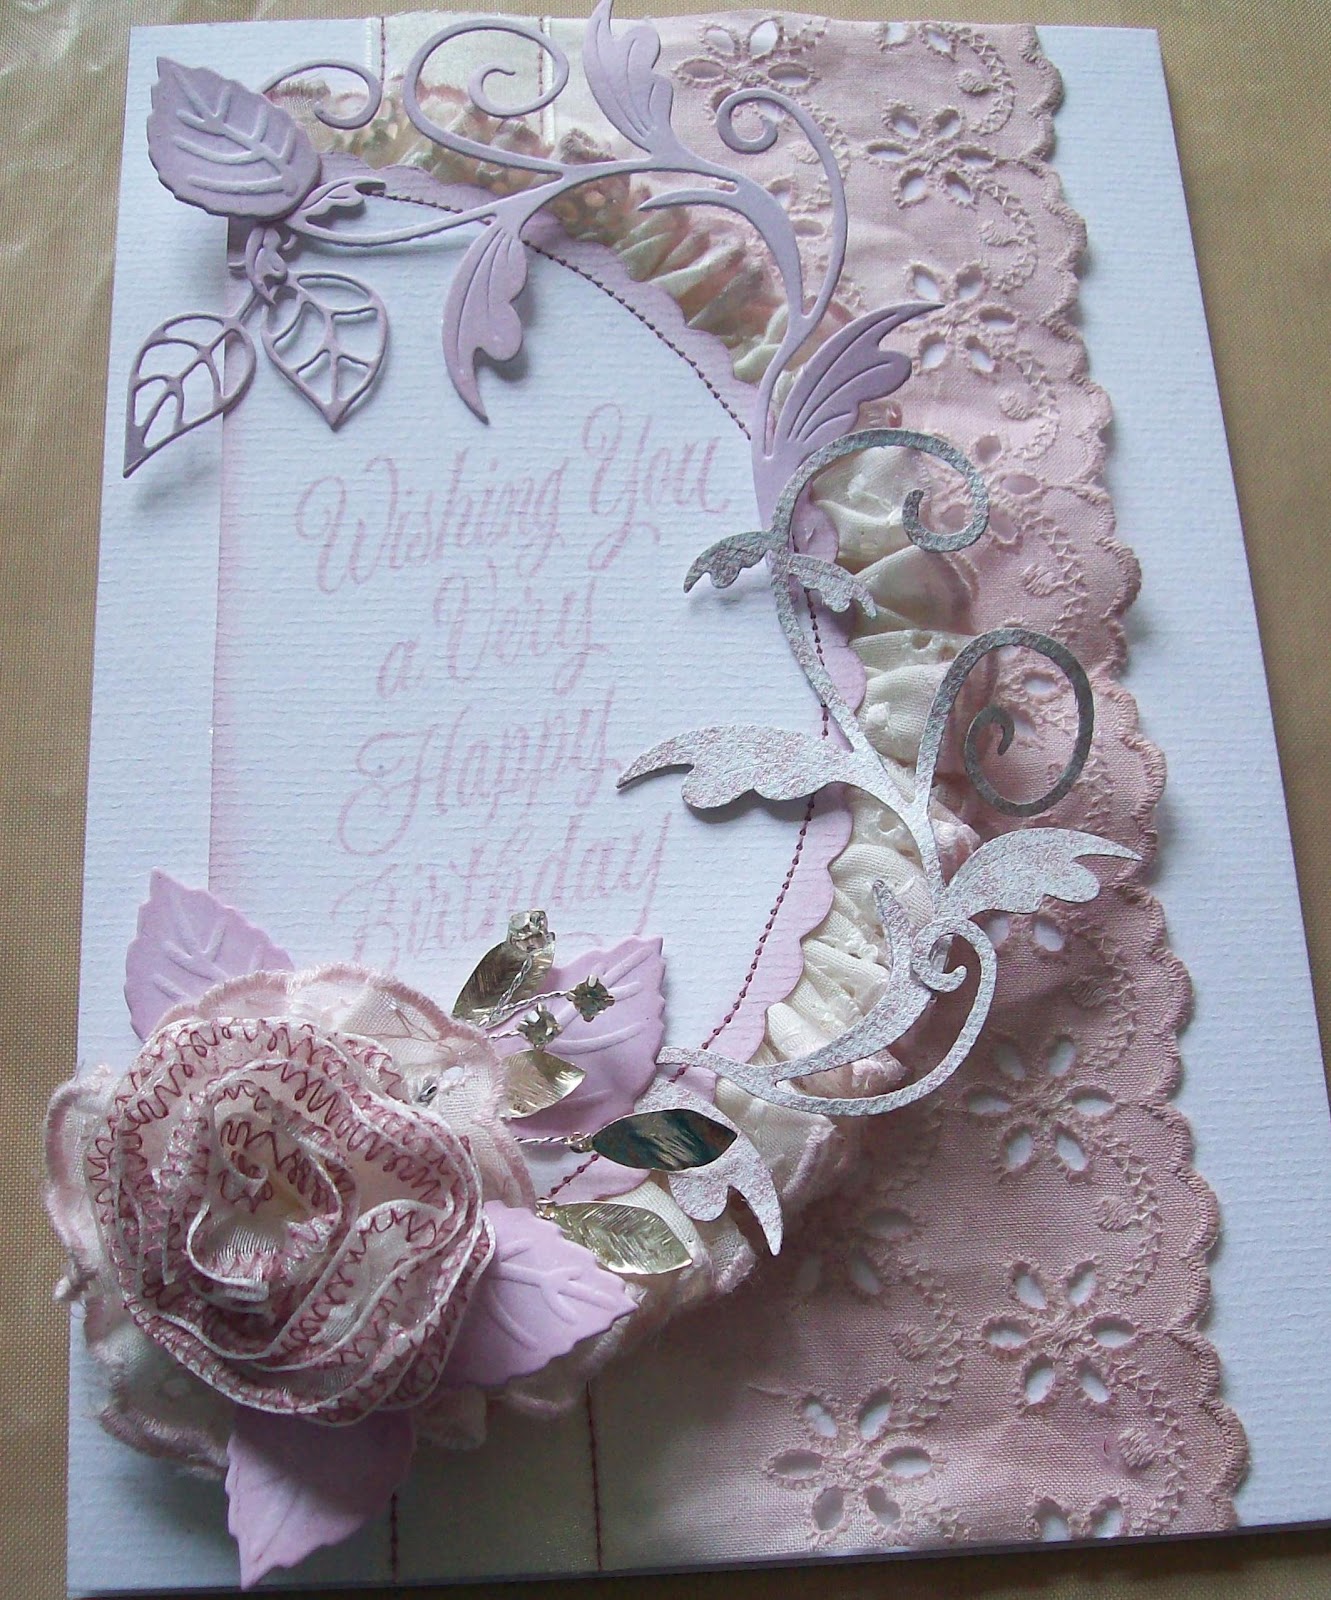
 I started by colouring the broderie anglaise lace with milled lavender distress ink and machine stitched it to the plain cream cardstock along with some 1" organza ribbon. Then I gathered the narrow lace and  machine stiched it onto a simi-circle of stamped and distressed cream card.
I made a ribbon rose by zigzag machine stitching some 1" organza ribbon in a contasting colour thread, gathering and rolling it.
A few die-cut and coloured leaves and flourishes add the finishing touches.


For this next one, I used pumice stone distress ink.

 I started by machine stiching some small white stars onto a die-cut piece of miriboard.
then I stamped, cut and distressed a circle of pearlescent cardstock and edged it with some pearl beads on a string.
 I machine stitched some olive coloured ribbon onto a die-cut and distressed piece of  pearlescent cardstock, and then layered up using the topper, some die-cut leaves and swirls, and a paper flower.

If I can work out how, I will be entering the first card in the Allsorts challenge this week - there's a first time for everything!

Bye for now,
take care and happy crafting,

Shellie xx

Wednesday, 7 December 2011

Bright and cheery

I made this card for my best friends daughter who is 19 today.


Having spent the best part of the last month sewing (and still with more to do), I enjoyed taking a few hours out to make this for her.

Ok, it's back to the sewing machine for now, so I'll say cheerio, and see you soon.

Happy crafting,

Shellie

Tuesday, 29 November 2011

Busy, busy, busy

Hello all,
sorry I haven't been around for a while, I've been so busy making Irish Dancing costumes over the last few weeks, I've hardly had time to sleep, let alone do any paper crafting!

Here are a few of the costumes I made a while ago, I will get photos of the new ones soon and share those with you too.


I am taking Bayleigh to Kettering on Saturday fot the World Championship Qualifiers. The lilac and white dress is hers, but she is growing so quickly that I will have to make her a new one very soon.


On a different note, I did make time to visit Jo and Mark Channon at "Lets Create" in Coningsby on Sunday morning. Their wonderful shop has been open for a year, and to mark the occaision they had a party weekend!. The place was packed to the rafters with customers, cakes and guest demonstrators. I saw Sheena Douglas demonstrating her wonderful new stamps, and had to come home with a set!
I'm itching to play with them, but I know that once I get them out, the sewing machine will be abandoned, so I dare not play just yet, but watch this space............

Thursday, 10 November 2011

Some previous makes

Hi all,

today I have been busy making and photographing a card for the Spellbinders design team call. I can't share it with you at the moment, but I will in due course. I'd like to wish all other contestants good luck, I'm sure there will be thousands!

Instead, I thought I'd share some cards I made a few weeks ago. I had a lovely time playing with my new Grand Calibur and dies (my wonderful hubby bought them for me), and made 6 cards!
each one very different, and each one as enjoyable to make as the next.


Thankyou for visiting.
Take care and happy crafting,

Shellie

Tuesday, 8 November 2011

Two cards for today

Hello all,
I've got two cards to share today.


This first one I made with my new toys.
I used a x-cut shape die for the layering with white and matt textured gold card,
spellbinders Anemone  Flower with parchment paper and diamond Stickles for the topper,
"La Rue Flourish"  and "Elegant Scrollwork" dies by Memory Box (bought from Oyster Stamps). 


This next one was made for a challenge on World of Crafters forum.


The instruction was for the card to be clean and simple, the background to be mostly "white" space - i.e a single block of colour, with no pattern colour, but it can be embossed. There were to be 3 elements in row near the bottom right, and a sentiment beneath.

I used the 6x6 template "mini butterflies" by Crafters Workshop for the background, matted onto some lilac pearlised cardstock,
I mounted 3 butterfly peel-offs onto the same lilac cardstock, which I cut out and moulded around a pencil to give them some depth.
I hand-tied 3 silver organza bows and stuck the butterflies to them using odour-free silicone gel.
I printed the sentiment (made on one of my programs) onto white card and mounted it onto the lilac card.
I used thin foam DS tape to mount the backgrounds and sentiment, and silicone gel for the toppers.


I hope you enjoy looking at my latest makes,
take care and happy crafting,

Shellie